
After clicking OK in the new query window the main window appears with the Query Name, Notes, Source, and Fields filled in.
You can now specify field ranges and apply the query.
Click on the picture for more information.
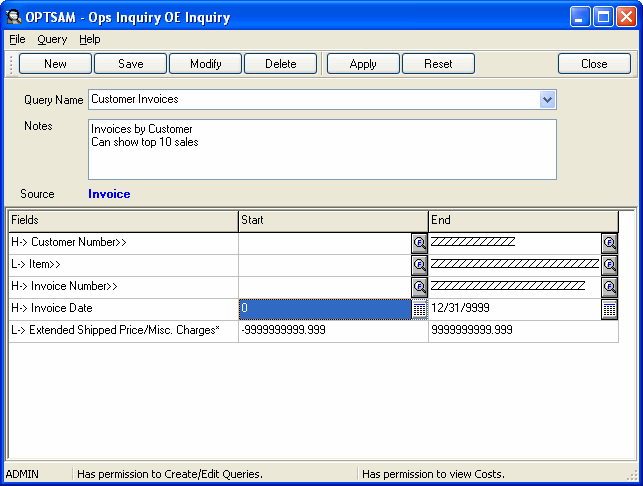
Setting the range limits the data that is extracted from the database to the query.
You set the range using the start and end fields on the main window for any given field. Some of the fields may have a button on each of their range cells.
![]() The
Finder button displays a window listing possible field selections and
several tools for searching for the information that you want.
The
Finder button displays a window listing possible field selections and
several tools for searching for the information that you want.
![]() The Calendar
button displays a calendar from which you can select the date.
The Calendar
button displays a calendar from which you can select the date.
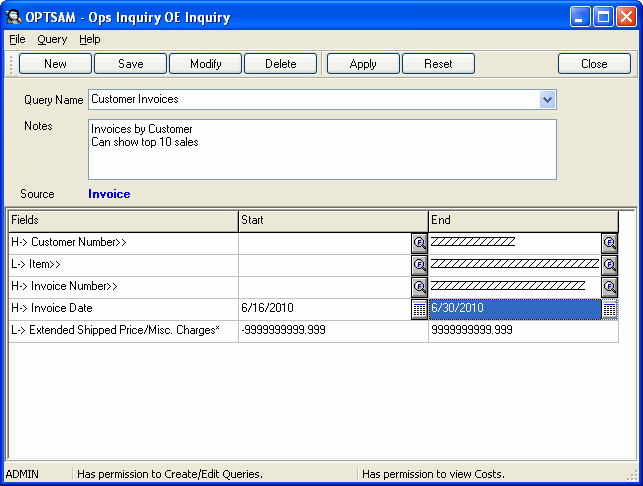
Optimizing a query
Setting ranges also speeds up the time between applying the query and viewing the results. To optimize a query, set the range to eliminate unwanted information (for example, to get rid of zeros).
Include only the records that you want in the range. (For example, you can set the start for Quantity On Order to "1" to eliminate all complete lines.)
For example:
-
In OE Inquiry, set the invoice date.
-
In PO Inquiry, set the Expected Arrival Date and Extended Cost.
-
In IC History Inquiry, set the Source to OE.
Note: To reset the range to include all records in the query, click the Reset button.
Click on the picture for more information.
Click the Close button to close the Inquiry program.
Note: Transaction Type is not a string in Sage 300. To see the string equivalent of the number see Transaction Types.